Wednesday, January 10, 2018

Kirigami Paper Flowers

I am all about the paper crafts lately. This easy paper flower is a hit with my teens, and since you can quickly learn how to make them, I just so happen to have about 10 of them on my desk right now - not that I'm complaining. So cheerful!

The photo at the left here is actually two flowers stacked on top of each other. Doesn't it look lovely that way?

This craft isn't origami, because it's not just folding, and I don't know if it's technically kirigami (folding and cutting paper), because you're also using tape, but it's still fun. We can call it kirigami, anyway.


You Need:

Paper - any kind, but probably not something too thick, like card stock.
Scissors
Tape

Here's How:


Start with a square of paper. If your paper isn't square, you can make it square by folding the short side of a rectangle onto the long side, and trimming off the excess.


Fold your paper in half on the diagonal, then in half again, and then again.
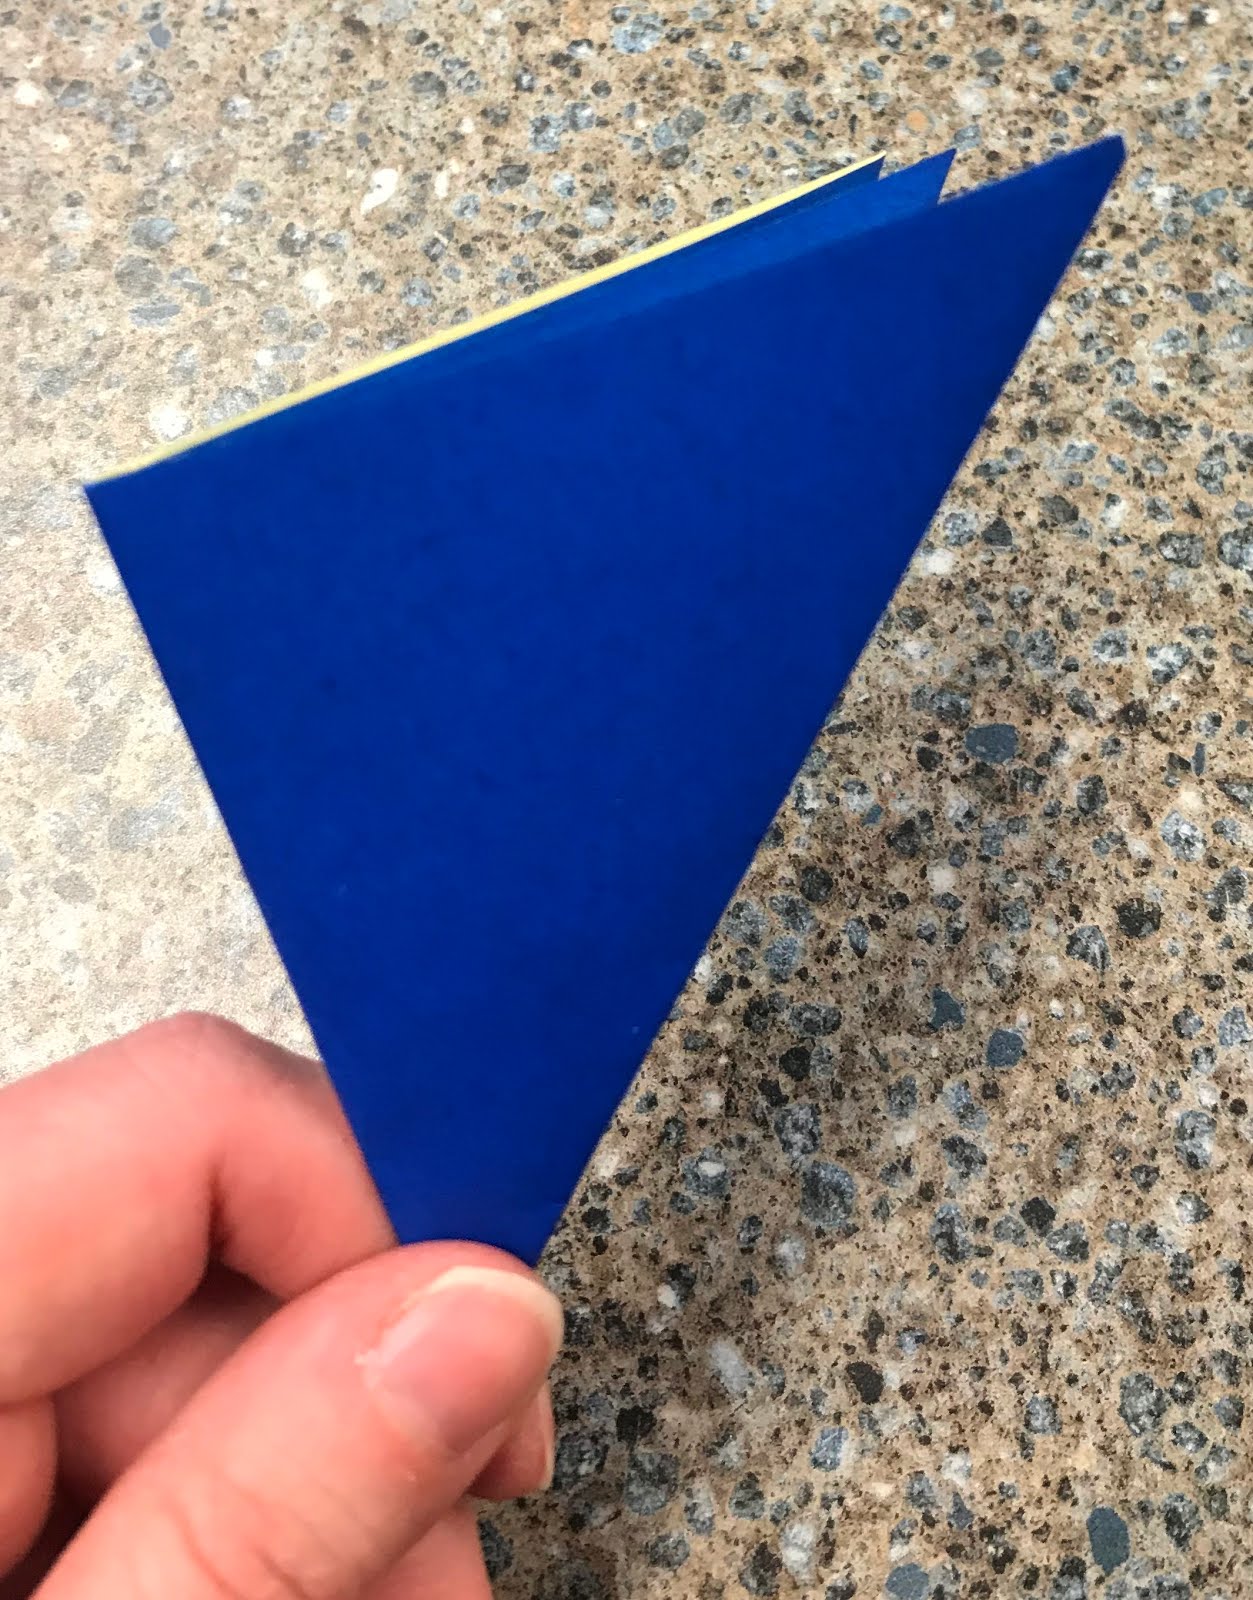
 

With your favorite pair of scissors, cut off the corner (the right angle) and round out the shape. This will be your petal shape.


The next cut you want to make will be in an arc shape, as I drew here. Make sure you start at the open end of the paper (not the corner where all the folds meet), and cut toward *but not all the way to* the other corner.


Unfold your paper, and behold its beauty.

Put a bubble of tape in the center of your flower. Then, take the center paper flap on one of the petals, and fold it toward the middle of the flower, securing it to the tape.


Repeat on the other three petals. You are done!


Variations:

You can use any type of paper at all. You can paint/color/decorate blank paper to really customize them, or use recycled books, origami paper - anything! They also look very nice when you stack them on top of each other, as in my original photo (at the top). GORGEOUS, I tell you!

Monday, January 8, 2018

3D Paper Snowflakes

Have I mentioned how much I love arts & crafts? I really do. I've started an almost-weekly art program for teens, which I'm calling "Crafternoon" (I also love puns), and I've pulled out all my favorite crafts - plus a few new ones! 

This craft is also my current decoration on the windows near my desk. 

It's super easy to make these, and you can use any kind of paper that you want. Origami paper, wrapping paper, construction paper - even boring old printer paper. I've chosen to upcycle an old book that had been recently weeded, since I'm in a library and all. 


You will need:

Paper - 6 sheets per snowflake
Scissors
Tape
Stapler

Instructions

 1. You need six sheets of paper for each snowflake, preferably all the same material, if not color. Because my book wasn't a square to begin with, I did the old trick of turning rectangles into squares - fold the short side against the long side to form a right triangle, and trim the excess.


2. Fold your square in half diagonally, and then in half again.

3. Starting at the folded edge, make three cuts parallel to the long side of the triangle. I've drawn them here in orange marker, but you don't need to draw anything out - just cut through the entire piece of folded paper, starting at the folded edge - but don't go all the way to the end.
 

4. Unfold your paper and behold its beauty. It should look like this: see how the cuts make a V at two corners, but are joined on the other two corners? Perfect.

5. Take the paper flaps in the center of the square and curl them toward you into a small tube. Tape to secure.

6. Flip your paper over and take the next-innermost flaps, and curl them toward you into a small tube. Tape to secure.

7. Again, flip your paper over, so your last tube is on the bottom. Take the next-innermost flaps, and curl them toward you into a small tube. Tape to secure.

8. One last time, flip your paper over, and tape the last two corners together into a tube. 

THERE! Isn't it beautiful? Your paper tube-spiral should look like this.

9. Repeat with all sheets of paper, so you have 6 paper tube-spirals.

10. Take three of your spirals, staple them together at one end. Then, staple the spirals where the paper touches, at the widest part of the spirals. Repeat, so you have two of these.
 

11. Staple your two half-snowflakes together, and attach the last two corners of the spiral. And... voila!
 

Notes

Since you're attaching multiple sheets of paper together, your snowflake may be larger than you expected it to be. You can always start with smaller sheets of paper, but it becomes much harder to staple together when the snowflake is a smaller size. Glue or tape may work better in that instance.

You can also make snowflakes with 8 or 10 sides, but even numbers always look nicest, because they're symmetrical. 

Tuesday, November 28, 2017

Book Necklaces

I didn't realize it was backwards. Whoops.
Our next foray into wearable art is the book necklace. I made a sample over a month ago, and I very often get comments when I wear it (usually, "where did you get that?"). It isn't hard to make one of your own, but there are several steps involved.  Here's how:

You Will Need:
* One sheet of plain, white paper (printer paper works)
* Card stock or thin cardboard (NOTE: I used white card stock for this project this time, because I had several sheets on hand, but I have done this before with a cereal box; because we are covering the book, it doesn't matter if there is a pattern on the cardboard or not.)
* Colored or patterned paper, for the book cover
* Scissors, tape, glue, ruler
* Necklace string
* Clasps (optional)
* Thumbtack or needle, to make a hole for the string

Not pictured: string, because I forgot it until after I took the photo.
Step One: Folding
Fold the white paper in half from top to bottom, and cut along the fold.
- Take one of the half-sheets and fold it in half, and in half again, and again, and again.  You want 32 small rectangles.


Step Two: Cutting
- Cut out the rectangles; you will need 12 for this project. You can recycle the others, or use them for bookmarks.

Step Three: More Folding and Stapling
- Group the paper into 4 groups of 3 rectangles each.
- Fold each group in half, and staple along the crease. You should have 4 small paper books.

In progress.
Step Four: Taping
- Tape two of the stapled bundles together at the spines; repeat with the other two.
- Tape all four of the little books into one big book.


Step Five: Card Stock
- Set the pages aside and measure out a cover for your book out of card stock.  I found that it worked best if it measured 2.75" x 1.5". When we did this project at the library, I had all the covers pre-cut, so we didn't have to fuss with rulers and pencils and such.
(Why? It needs to be slightly taller than your pages are tall, and a long enough to cover both front and back of the little book, plus room for a spine. Because our little book is roughly 1.25" tall by 1" wide, this seemed to fit well.)

I know you're all jealous of my Woody the Owl ruler, but I'm not selling it.
Step Six: Making a Spine
- Before adding patterned paper, I folded my little book cover around the pages, pressing down to make a nice square spine. This step is optional, but I find that it makes it easier to put together in the end.

Sometimes it helps to see it, not just read it.
Step Seven: Adding Patterned Paper
- Cut a piece of patterned paper that's slightly bigger than your book cover.  I found it easiest to lie my card stock on the wrong side of the patterned paper, then drawing a rectangle around it, making sure to leave 1/4" or so of room for glue.
- Glue the card stock to the blank side of the paper, and then cut off the corners.


Step Eight: More Tape
- Tape down the patterned paper on all four sides, then re-crease the card stock to make it into a book shape again.


- Make a bubble of tape and apply it to the inside of the book cover, on the spine. Press the pages into the tape and hold tightly. You now have an adorable little book!

It's so cute!!
Step Nine: Making a Necklace
- Take a needle or a thumbtack and make a hole toward the top of the spine of your book. Wiggle it around until it's big enough to thread some string through. (Alternately, you can use a jump ring, but I didn't have any of those on hand.)
- Thread a string through the book spine, and cut it to the appropriate length.  Either you can tie your string ends and slip the necklace over your head, or you can add a clasp.


Enjoy!
Miss Kat's Notes:
- Yes, this is held together with mostly tape, but I've had mine for over a month and it hasn't fallen apart yet. I assume you could glue it, but I haven't had the need.
- If you are using cardboard with a pattern on it that you don't want to see, be sure to glue that side of the cardboard to the paper, thus hiding the Trix Rabbit.
- You could get really fancy and print out or draw a tiny copy of your favorite book cover and use that to cover the card stock. I found that I enjoy having a generic book, rather than a specific one, but it's up to you.

Friday, August 4, 2017

Dragon Crafts

 
It's the height of Summer Reading, and this year we're doing a Games theme ("Come Inside and Play!")

This week's theme is Dungeons and Dragons! And as such, we have celebrated Harry Potter, watched The Sorcerer's Stone, and done THREE dragon crafts - one for kids, one for teens, and one for little guys at storytime. I know you're super excited to hear about all three, so I've put them all in this one post.


Little Kids

For dragon-themed storytime, we read Dragons Love Tacos by Adam Rubin, If I Had a Dragon by Tom and Amanda Ellery, and When A Dragon Moves In by Jodi Moore. (Note: Dragons Love Tacos is much longer than I usually do for storytime, but it went really well!)We did the dragon hokey-pokey, sang "Pop Goes the Dragon,"and made what I was calling "dragon blowers," for lack of a better name.

You need:
  • Green cardstock
  • Paper streamers (red, orange, yellow)
  • crayons, markers, etc.
  • Stapler

You can use toilet paper tubes for these, but then you'd have to paint them all green, so I just made tubes out of green cardstock (cut in half and stapled at the back). We glued strips of paper streamers (the kind you use for parties - it's about $0.99 for a huge roll) to the inside. Draw eyes on the end that doesn't have fire coming out, and a couple nostrils, and you're all set! If you blow through the end with the eyes, the paper flames will flow out and look like he's breathing fire! SO COOL! A note: These are much easier to decorate *before* you staple the paper rolls together.

To be totally honest, I wasn't super thrilled with the way this craft turned out, but the kids loved it, and that was the important part.

Kids

Cut, decorate, staple - done!
His name is Norbert.
With elementary school age kids, we made dragons out of paper plates. I found this on the Pink Stripey Socks blog - you can download the template there for free.  I printed out the template on neon green cardstock (it's easier to see on a white paper plate), and cut out five copies - one for each of my four craft tables, and one extra in case it was needed. The kids were supposed to trace the pattern, cut it out, and then decorate. It mostly worked, but I neglected to realize exactly how hard it is for little guys to trace things, and I did a fair amount of helping - not that I mind, as long as I have a free hand. (They were pretty good at the cutting part, and excellent at the decorating).

Once you cut and color your dragon (we used markers and crayons), you staple him together and he's ready to be played with. That easy!

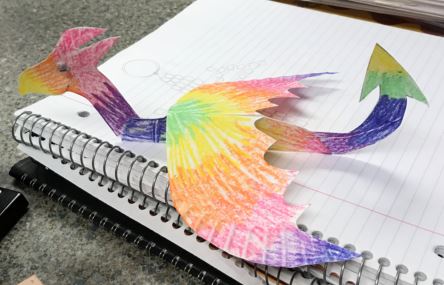
My dragon is rainbow tie-dye, because I made him and I enjoy cheerful things.

Teens

IT'S SO COOL!
The teen craft this week was dragon keychains. If you haven't made beaded keychains before, there are lots of tutorials online, and lots of patterns once you've got the basics, and while it looks somewhat complicated, it's really not that hard once you get the hang of it. I found this amazing beaded dragon keychain on DeviantArt, and cobbled together a pattern based on it.

You need:
  • string/jewelry cord
  • beads (pony beads work perfectly)
  • Keychains/fasteners 
  • Tape (optional, but helpful)

The first thing you do tape your keychain to the table, so you have a nice, stable working area. Next, cut a super long segment of string - like, 4 feet long. Better too long and cut off the ends, than too short and have to try to tie more on. Knot the middle of the string tightly to the keychain.

Let's take a look at our pattern.
The knot at the center of the circle (the keychain) is really one long string, but the two halves are colored blue and orange on the pattern, so you can see the difference between the two strings.

Our first line (going top-down) has our orange string going through two beads - go ahead and do that. The blue string also goes through the same two beads, but in the opposite direction. When you do this, you'll have two beads on your string, with the ends hanging down on each side (kinda like a bolo tie - see below). 

String beads on both strings.
Start your second line the exact same way: string three beads on the "orange" string, then string the same three on the "blue," going the opposite direction. Continue as per the pattern.

The tricky part here (which I simplified from the photo I saw on Deviant Art) is the wings. I only used one string for each wing, doubling back on itself at both the outer tip of the wing, and the bead closest to the dragon's body. I hope the pattern makes sense to you. 

The teens needed a little help getting started, and a little help with the wings, but they had a great time, and wanted to know when we could meet again and do different characters (I'd printed out some examples, like a butterfly and a Pikachu).


Finished dragon.

Overall


Dungeons & Dragons Week went well! The kids had fun, I had fun, a good time was had by all. I will definitely do the beaded keychains again, and the other ones were cute (but I don't like to repeat too often).


Thursday, August 3, 2017

Cupcake Wrapper Owls

I can't remember the first time I made these. It's been a few years, and every so often, I drag it out and do it again, because it's cute as all heck. I pulled it out this summer because we did an Oregon Trail themed week, and had the local Audubon Society come and do a show with live owls (which was SO COOL, you guys!).

So, of course, we had to make our own owls, and they're super easy and also adorable, and cheap. (Easy, cheap, and adorable is the magical trifecta of kids' crafts, in my book.) Here's how we did it:


Supplies:

  • Toilet paper tubes (or paper towel roll tubes, cut to size, if you have concerns about hygiene)
  • Cupcake wrappers (2 per owl)
  • Construction paper or cardstock
  • Markers or crayons
  • Glue

Directions:

  1.  Flatten your cupcake wrappers, and decorate with markers or crayons, if desired. 
  2. Using your thumb, push in two sides of the top of the tube to make the owl's head, with "feather tufts" sticking up on either side. (See photo for what I'm talking about.)
  3. Cut two large circles from colored paper/cardstock, and smaller ones from white. Cut one orange triangle for a beak. Glue the face together as shown in the photo above, overlapping the colored paper slightly. Set aside.
  4. Cut one of your cupcake wrappers in half; these are your wings. Cut the other into quarters; these are your tail and feathers. I found it easiest to start with the bottom-front feather, overlapping slightly to make a "ruffle" on the bird's front. Then, glue the tail, and finally, the wings (which you can position however you like - is he taking flight? Perched on a branch?)
  5. Once the feathers are all glued on, glue the face on the roll, overlapping the top of your feathers. Et voila!
Variation: If you don't have cupcake wrappers, you can use coffee filters (the white kind with the wavy edges). Flatten out the filter and cut off about an inch around the outside. The inside circle can be cut in half for the wings, and the wavy strip from the outside can be trimmed into 3" sections to use for belly feathers and a tail. If going this route, you probably want to decorate it before you cut. This would be really cool if you did the whole markers/rubbing alcohol craft, but you'd have to let that dry really well before starting.

Thursday, July 20, 2017

Kids Craft - Paper Plate UFO (with Alien!)


My apologies for not posting lately. Summer Reading means it's SUPER busy around here! This summer, instead of following the national theme, we are doing our own thing - games! Each week this summer has a different game as its theme, and this week we are doing Space Invaders. Everything is Outer Space! 

Aside from our Star Wars Party and showing of Star Wars: A New Hope, we had Perler Beads for the teens, and this funky UFO-and-Alien craft for the kids. Here's how to make your own!


Supplies:

  • 2 paper plates
  • 1 clear plastic cup
  • Pom-poms
  • Googly eyes, pipe cleaners, and other alien-decorating pieces
  • Crayons, markers, paints, stickers, or other decorations
  • Glue or tape (I used hot glue)
  • String or ribbon (optional)


 Directions:

  1. Decorate the bottom sides of your paper plates with markers, crayons, stickers, paints – or however you like! (If painting, let dry before continuing.) This will be the outside of your UFO.
  2.  Make your alien by decorating a pom-pom with googly eyes, pipe cleaners, feathers (they make great tentacles), etc..
  3. Tape or glue the lips of the plates together, so both decorated sides are facing out.
  4. Glue your alien to the middle of the top of your UFO.
  5. Glue the plastic cup so that the alien is inside it – he’s steering your ship!
  6. If desired, glue a loop of string or ribbon to the top of your UFO so that you can hang it up.

How It Went:

I made the decision to bring my hot glue gun for this one, because it dries in seconds instead of the hours that Elmer's takes. I had expected the kids to REALLY want to use it, but it was a non-issue. I'd make this decision again, because it meant that they were sturdy and ready to be played with immediately.

Something I hadn't counted on: they're flying saucers, and so kids were throwing them around. (In hindsight, I should have known that would happen.)

Everyone had a great time with this one! We talked about different materials you could use, like applesauce cups instead of plastic drinking cups, or bowls instead of plates. I mentioned you could glue on things like buttons and bottle caps, too, and I could see the wheels turning in one little mind. (I hope he brings me pictures!)