 Easy-Peasy Lemon Squeezy!
 I've seen this awesome canvas art floating around, where you use painter's tape or masking tape and block out various areas on your canvas, and then paint the different shapes in different colors, and when you peel it off - voila! You reveal the nice, clean lines underneath the paint, and it looks really professional and awesome. So, that was my plan, but when I told my teens about it, one started explaining how she did that in art class once, but they made tree shapes. COOL, said I. LET'S DO IT!
You need:
Canvases (we had a whole bunch in the storage room)Paint (I used tempera paint - not the best, but it works)
Brushes or sponges (we had old kitchen sponges - perfect!)
Painter's tape or masking tape
Scissors (optional, but super helpful)
 |
| Super Kat Power - activate! |
Let's Do It!
So, take your canvas, and tape out a cool shape that you want to see later. For the one at the left here, I cut out flower petals and a center from masking tape, and then wrote my name with tape scraps. Be sure to push your tape down really securely, or some paint may seep under the edges (which can actually work for you, if that's what you're going for - see the second example). I would have taken a Before photo, but I honestly forgot - sorry!When you're satisfied with your design, you can start painting. One thing that I neglected to realize is that tempera paint doesn't sink into a canvas like acrylic paint would, so it was a bit streaky. We solved this problem in two ways: Some of us embraced the streaks and made them part of the finished art (see above), and some of us used sponges to dab the paint on and make a cool, marbled effect. For the flower picture, I used a blend of blue and green, and a bit of white. I didn't even really mix them on the paper plate that passed for a palate - I just kept daubing with my sponge until the colors blended right on the canvas.
When you like the colors you have, you need to let the canvas dry for a few minutes. (Waiting was seriously the hardest part.) Then, you can peel off the masking tape and - behold! Your beautiful, super easy, lemon-squeezy art work!
Examples
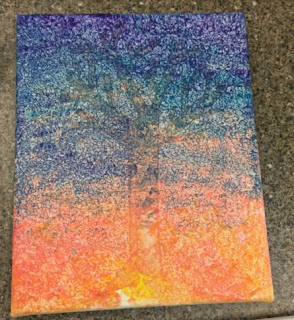
We had a few who went with the tree design theme.Branches were easier to manage when we used scissors to cut the tape.

This one was particularly cool because our artist not only embraced the streaky nature of tempera paint, but took the scrubby side of the kitchen sponge to streak backwards over her rainbow, making it go from "pretty neat" to "OMG that's AWESOME."
And here's my handiwork. I tried to make it look like a sunset, which... kinda worked.


One of the neat things here is that I didn't push the tape down all the way to the edges (oops!), so a small bit of my bottom paint layer - pinky orange - seeped under the tape. Which I think actually looks pretty cool. I kept telling the teens that there were no mistakes, only happy accidents (just like Bob Ross! And they knew who Bob Ross is! DAY MADE!)


No comments:
Post a Comment